

EN
This cinematic video was a personal project, inspired by the concept art of Nadu at Vertigo Studio.
- I was showing my work and progress every week to Damien Peinoit. His help was great, and his artistic skills are next level.
Go with me for a breakdown of the entire project. I'll explain how certain props were made in another article!
FR
Cette cinématique est un projet personnel, réalisé à partir du concept art de l'artiste NADU ( Vertigo Studio).
- Merci au talentueux Damien Peinoit pour ses conseils avisés pour ce projet !
Suivez-moi pour un breakdown détaillé de la scène ci-dessous !

Inspirations & Références
I've based my work on one concept art by the concept artist NADU.
To group all my references, I used the software PureRef; it is really useful and a great way to keep all your visual references in the same place.
Planning
I made a work plan for 4 months. This planning was reviewed a bit because of some freelance work that I had to complete.
It was decomposed on all the steps that made my workflow : Research - Blockout - Modelling - Sculpting - Texturing - Shading/lookDev - Lighting - Rendering.
During all the working times, I was filming with the software OBS, my screen to prepare some behind-the-scenes and breakdown. It was really interesting to organize and plan my different breakdowns.
Inspirations & Références
J'ai basé mon travail sur un concept art de l'artiste NADU.
Pour grouper mes références, j'ai utilisé le logiciel PureRef ; il constitue un excellent moyen de garder toutes vos références visuelles au même endroit.
Planning
J’ai établi un plan de travail sur 4 mois. Ce planning a été légèrement revu en raison de certains projets en freelance que j’ai dû terminer.
Il était décomposé en différentes étapes : Recherche de références - Blockout - Modélisation - Sculpture - Texturing - Shading/LookDev - Éclairage - Rendu.
Tout au long de mon travail, j’enregistrais mon écran avec le logiciel OBS afin de préparer des coulisses et des breakdowns. C’était vraiment intéressant d’organiser et de planifier mes différents breakdowns.
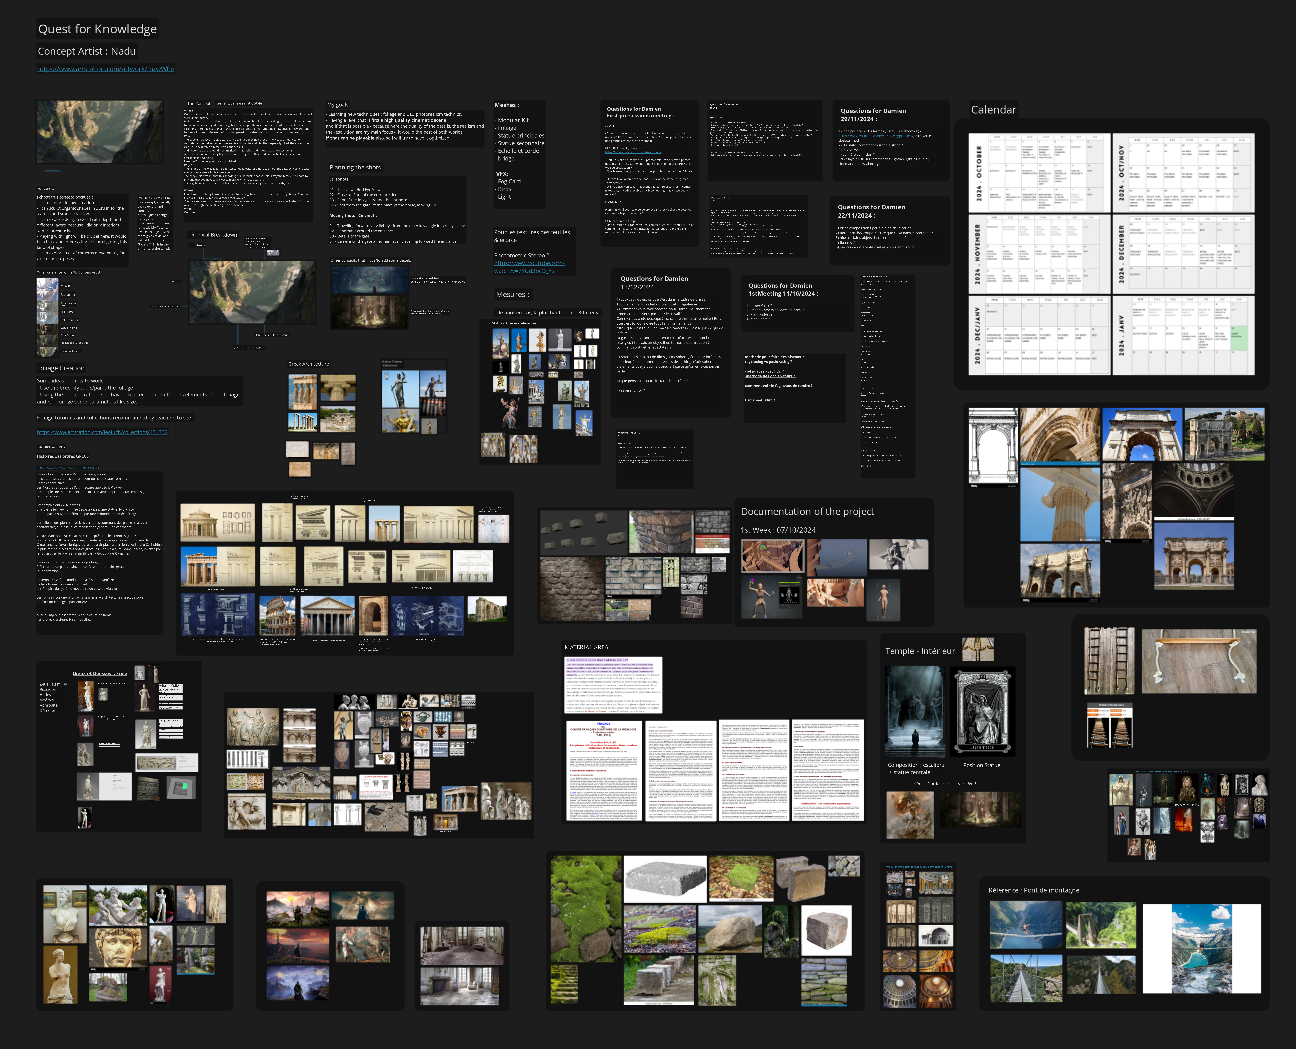
My PureRef at the end of the work. I began by my calendar and an action plan for all the steps of my workflow. I continued with
I left notes for myself, to-do list, list of items to review, questions for my mentor.
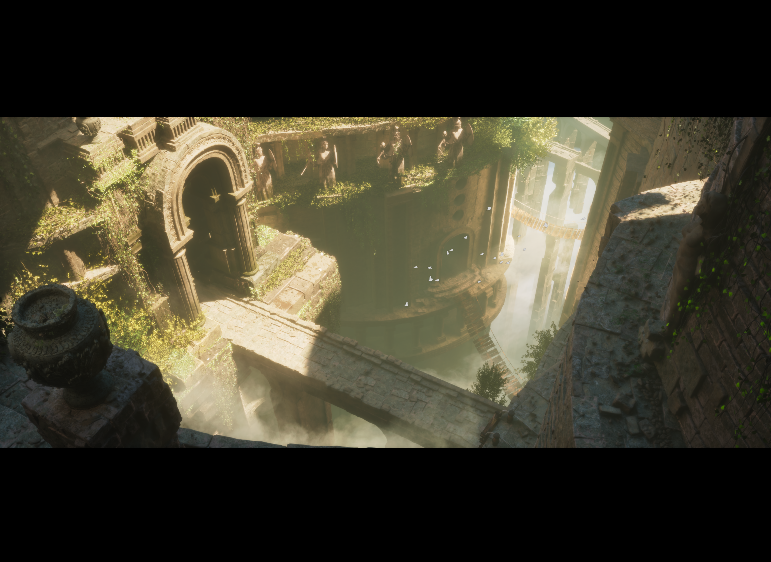
Composition
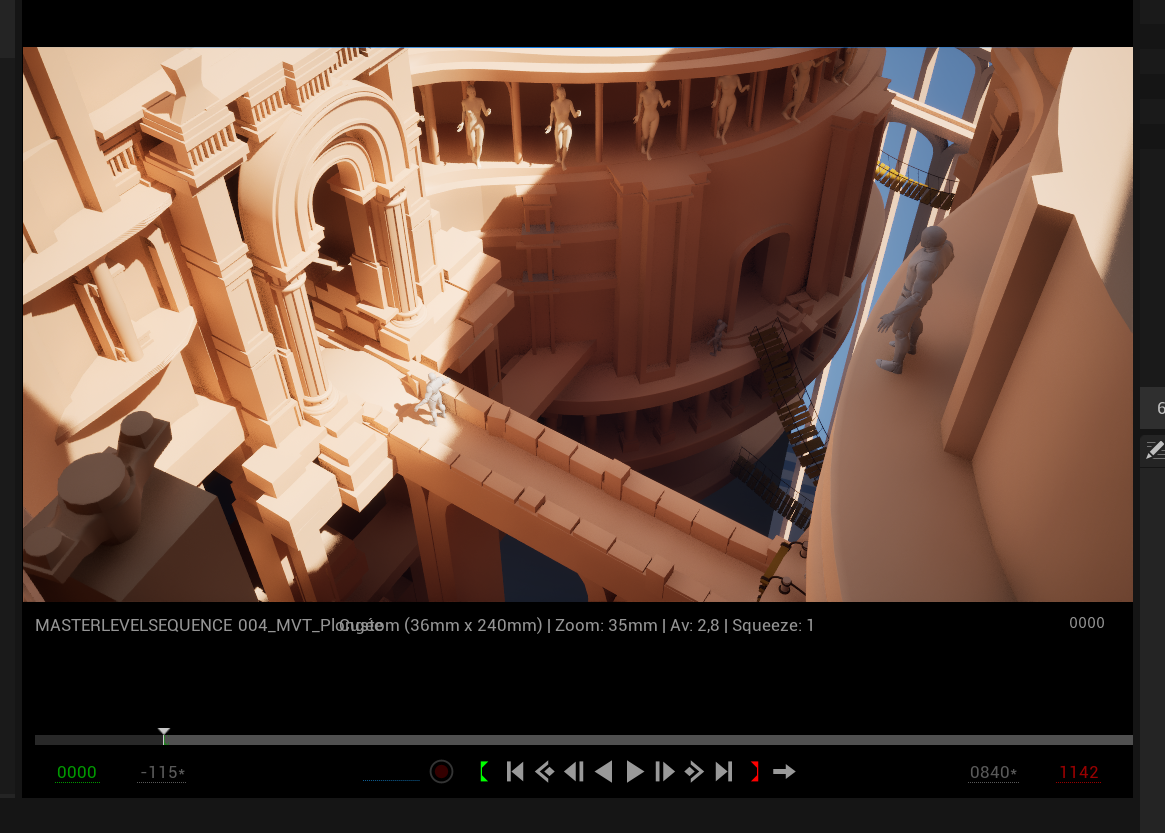
I've used the knowledge I gained in traditional art school to work on the composition of all my plans. I especially used the cinematic viewport of Unreal, which allowed me to dive into the art of composition, and place my props accordingly.
I also read a book recommended by the great artist Sergei Panin, who happened to be my teacher at the time, called Framed Ink by
Marcos Mateu-Mestre. It was a huge help to imagine the plans without proper concept art ( even if I used some references for it). I made my concept art in the principal concept art style.
I think this capacity for imagination is a great plus for every artist, even if they don't do the concept themselves at work.
Golden ratio : of course ! But not only, I tried to be creative and to experiment around composition.
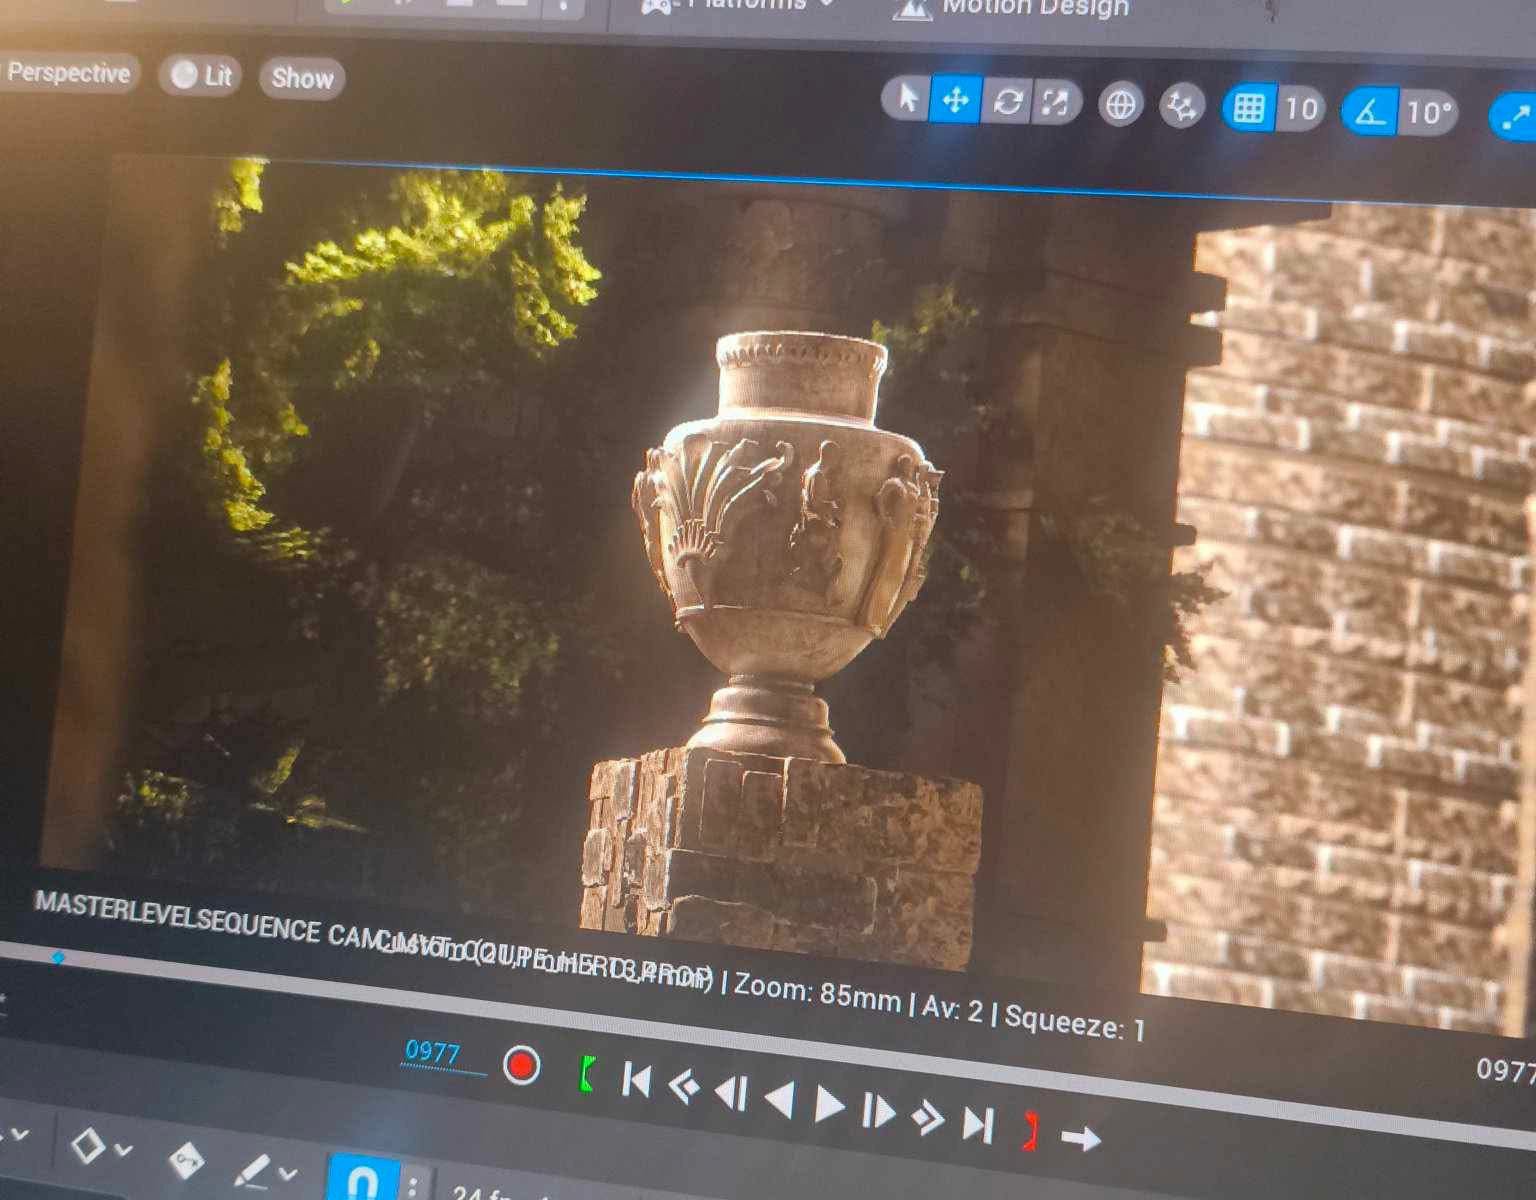
Camera Settings
I chose the focal length of 85mm; it gave me the cinematic look I searched for. The ratio of the image also matched this purpose, with a 2:35 ratio ( cinemascope).
Atmosphère, Intentions & Storytelling
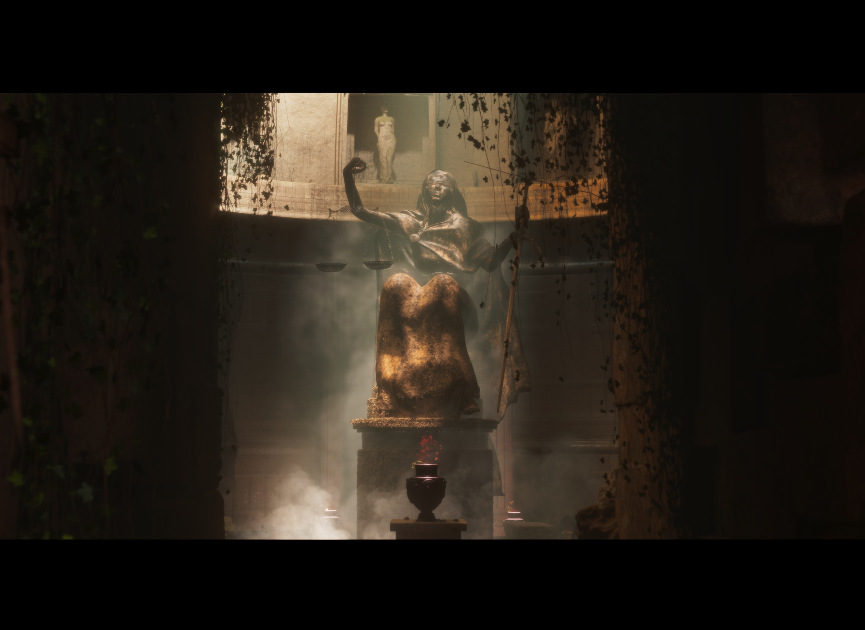
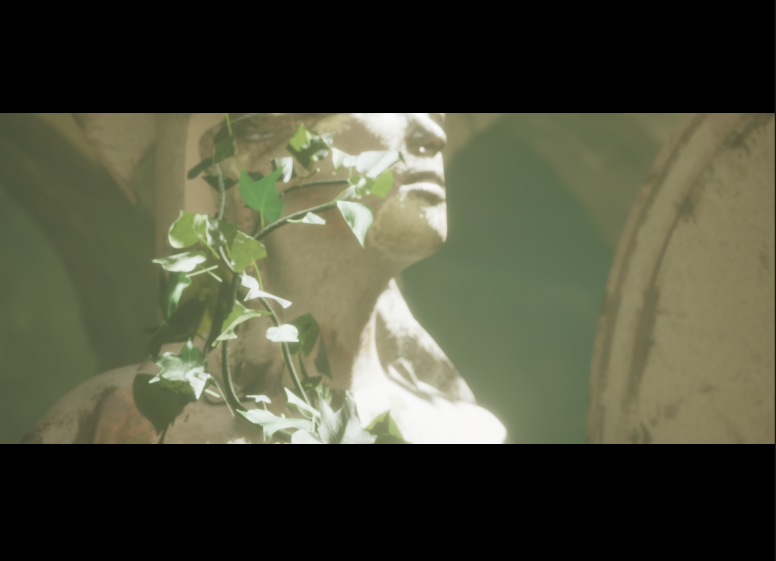
For this piece, I wanted to have a dreamy/atmospheric kind of sentiment ( I used cloud and fog with happiness in that sense).
I think, for an artist, having a clear intention is important. I wanted to have a film look, a filmic atmosphere and not a game one.
I wrote for this project a story behind that cinematic, to give it some substance.
Composition
J'ai utilisé les connaissances que j'ai acquises à l'école des Arts Décoratifs pour travailler la composition de mes plans. J'ai particulièrement utilisé le viewport cinématique d'Unreal, ce qui m'a permis de plonger dans l'art de la composition et de placer mes accessoires en conséquence.
J'ai également étudié un livre recommandé par l'artiste environnement games Sergei Panin, qui a été mon professeur à l'époque, intitulé Framed Ink de Marcos Mateu-Mestre. Cela m'a beaucoup aidé à imaginer les scènes sans concept art approprié (- autre que le concept art principal - même si j'ai utilisé quelques références réelles).
Je pense que cette capacité à imaginer est un grand atout pour chaque artiste 3D Environnement, même s'ils ne réalisent pas le concept art eux-mêmes.
Le nombre d'or : bien sûr que je l'ai utilisé ! Mais pas seulement, j'ai essayé d'être créative et d'expérimenter autour de la composition.
Paramètres de caméra
J'ai choisi une focale de 85 mm pour la plupart des plans; cela m'a donné le look cinématographique que je recherchais. Le ratio de l'image correspondait également à cet objectif - 2:35 (cinémascope).
J'ai choisi une focale de 85 mm pour la plupart des plans; cela m'a donné le look cinématographique que je recherchais. Le ratio de l'image correspondait également à cet objectif - 2:35 (cinémascope).
Atmosphère & Intentions
Pour cette pièce, je voulais avoir une sorte de sentiment onirique via l'ambiance atmosphérique (j'ai utilisé des nuages et du brouillard dans ce but).
Pour cette pièce, je voulais avoir une sorte de sentiment onirique via l'ambiance atmosphérique (j'ai utilisé des nuages et du brouillard dans ce but).
Je pense que, pour un artiste, avoir une intention claire est important. Je voulais avoir un look filmique, une atmosphère cinématographique et non une ambiance de jeu vidéo, malgrès le fait d'utiliser un moteur temps-réel.
J'ai également écrit une histoire pour ce projet, afin de lui donner plus de substance.

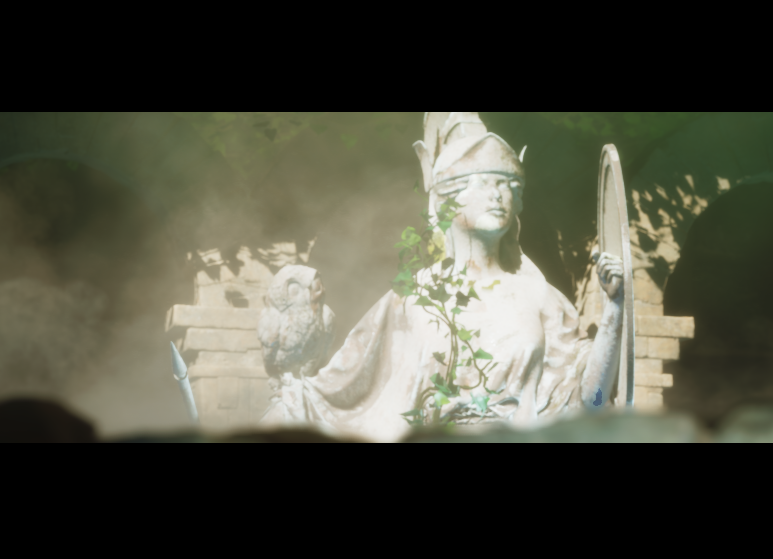
Scene 01 : beauty_shot

Scene 02 : An aerial view.

Scene 03 : Entrance. Symetric composition.
Scene 04 : Symetric composition.

The story that I created at the beginning of my project, inside my PureRef.
Blockout
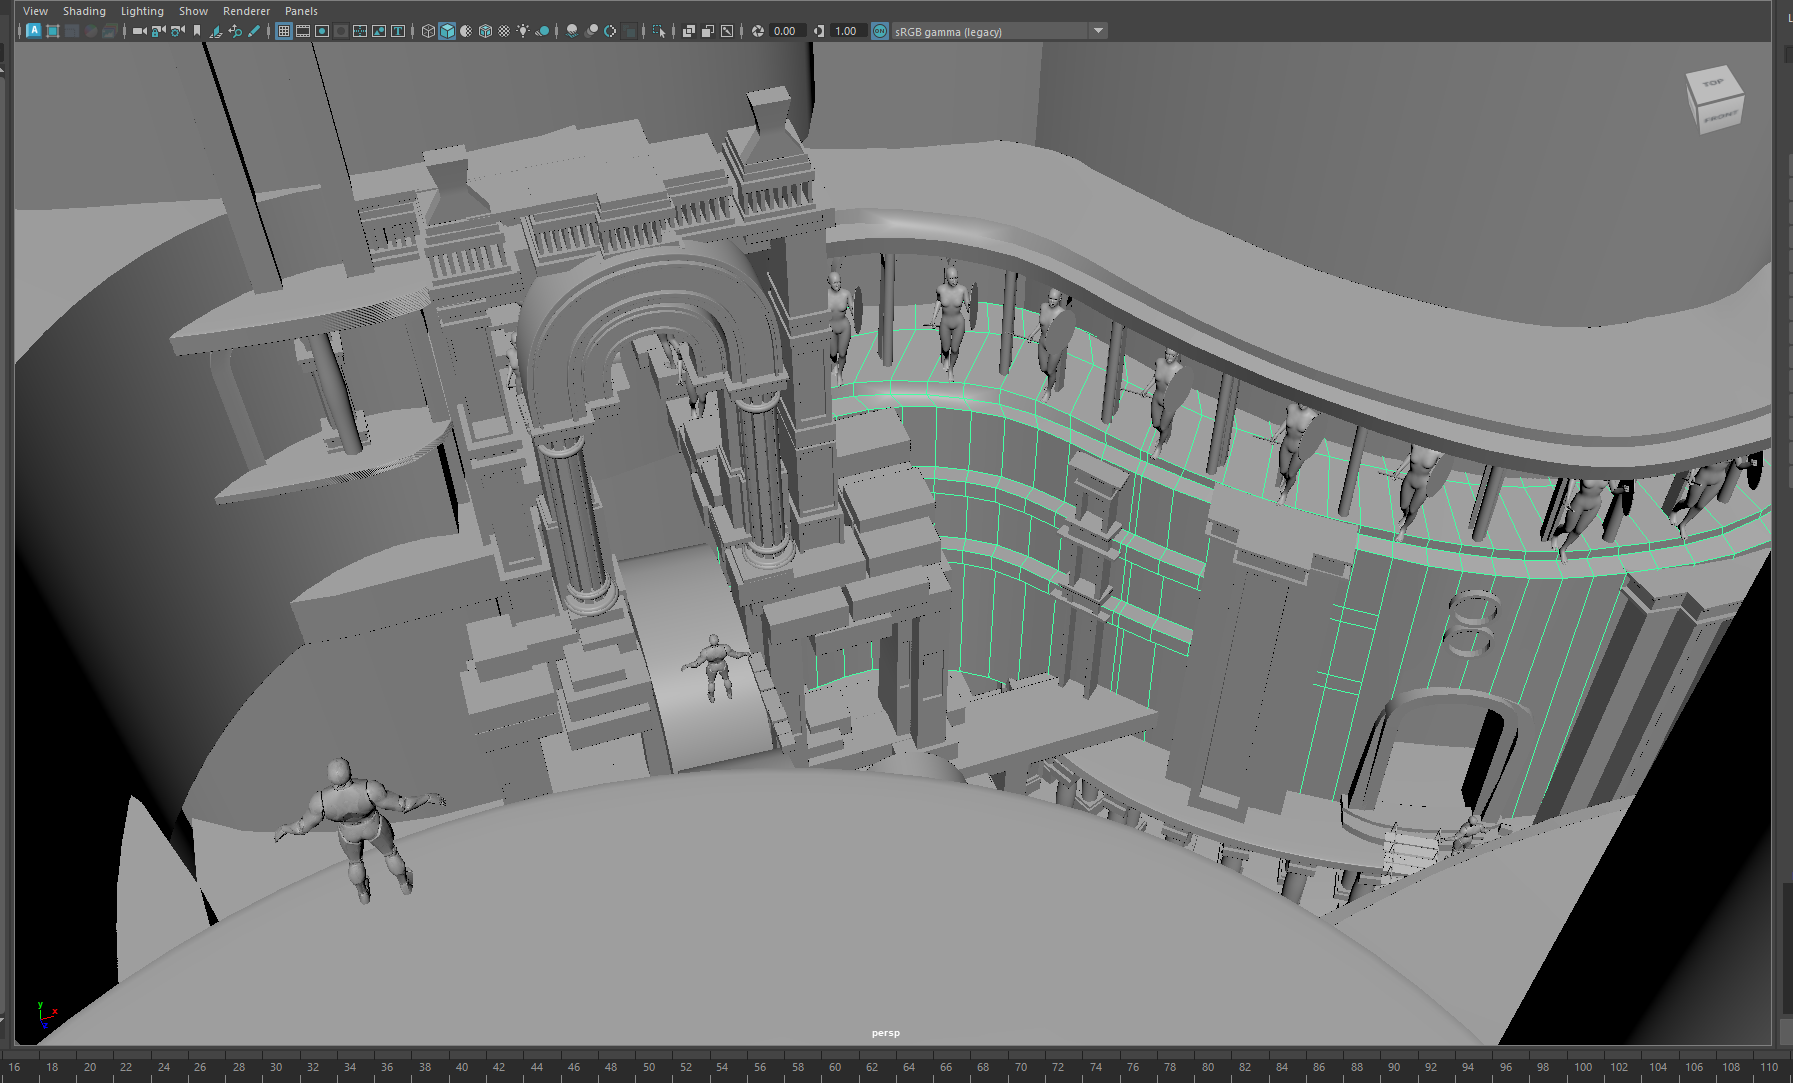
The first step was to build the blockout of my scene with simple shapes to establish the overall look of the scene and create an initial draft of the lighting setup.
I built this first stage using Maya 2024 with different materials to later implement them in Unreal Engine 5 ( as placeholders).
Blockout
La première étape a été de construire la blockout avec des formes simples pour mettre en place l'aspect général de la scène, et construire un premier jet de la scénographie de la lumière.
J'ai construit cette première étape dans le logiciel Maya 2024, utilisant des matériaux différents afin de les mettre en place dans Unreal Engine 5.
J'utilise toujours un mannequin Unreal Engine pour vérifier les dimensions de ma scène ; et vérifier également si les unités entre les deux logiciels matchent / ou peuvent se convertir sans problèmes.
Modelling & Sculpting
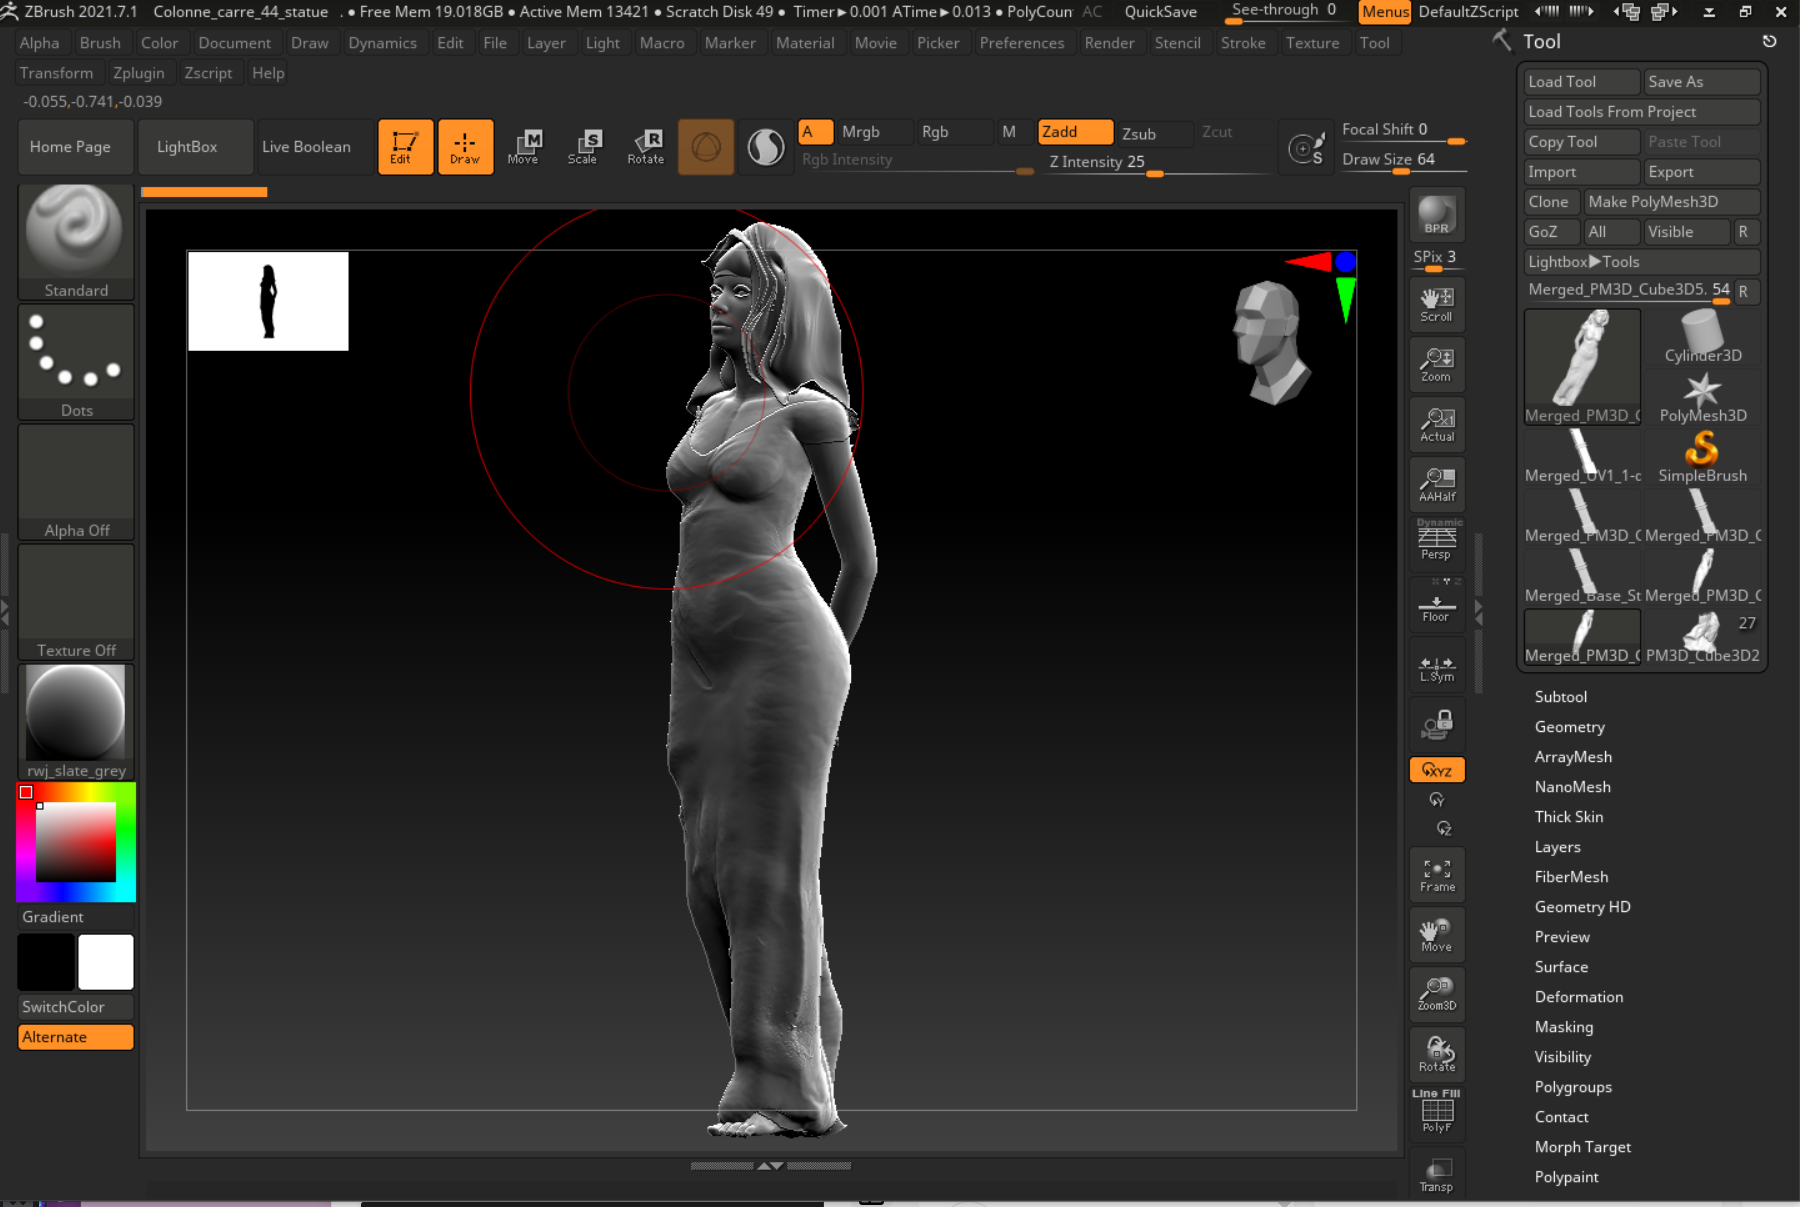
The sculpting was mainly done in ZBrush. I had to make choices at this stage to decide on my modeling techniques and workflow for my assets:
- The "hero-assets," meaning the objects I want to have as much detail as possible, will follow the baking workflow: modeling a low-poly and high-poly version of my assets, then I will bake the details from my high-poly model onto the low-poly one using Substance Painter (I also like to do this with Marmoset Toolbag).
- The other assets will be in mid-poly or even high-poly since I use Nanite (Epic Games' proprietary technology), which allows the topology to be recalculated into different triangle counts (like LODs) at differents distances in real-time.
Box Modelling & Sculpture
La sculpture a été réalisée dans le logiciel ZBrush. J'ai du faire des choix à partir de cette étape pour choisir mes techniques de modelage et de workflow pour mes assets :
- Les "hero-assets", donc les objets que je voudrais avoir le plus détaillés possible, suivront le workflow de baking : modelage d'une version low poly et high poly de mes assets, puis je ferais un baking des détails de mon modèle high poly sur le low poly grâce ici, au logiciel Substance Painter ( j'aime aussi le faire avec le logiciel Marmoset Toolbag).
- Les autres assets seront en mid-poly ou même en high-poly quelques fois étant donné que j'utilise les nanites ( technologie propriétaire d'Epic Games), qui permet de recalculer la topologie en différents nombre de triangles (comme des LOD) à différentes distances de caméra, en temps-réel. Il faut bien sur faire attention à ne pas alourdir la scène, et penser à chaque étape importante à faire un rendu pour vérifier si tout se passe correctement.
Texturing
The creation and painting of textures always begin with thorough reference research.
I used the PBR Validator to ensure accurate colors for my scene, keeping them close to real-life colors. This is an effect in Substance Painter (also available in Substance Designer).
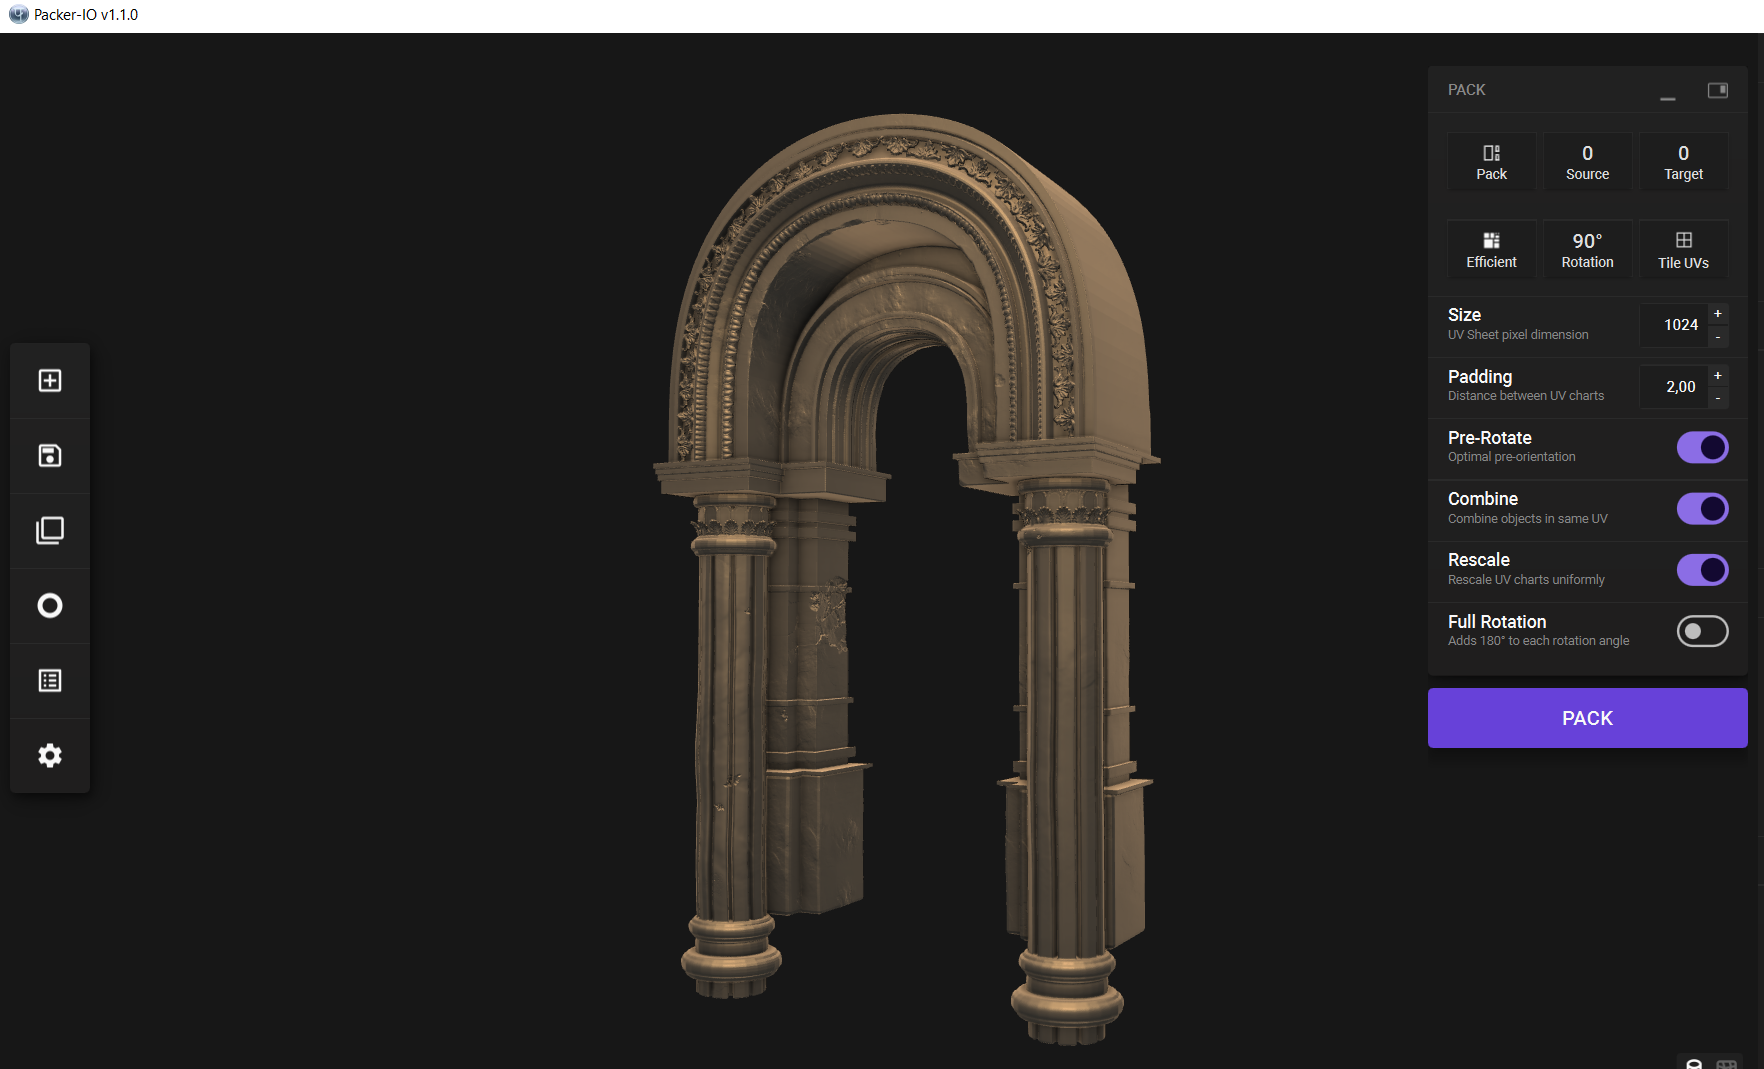
I've also used Packer IO, a free software that tidies up your UVs, and packed them in the best possible way.
Finally, I also prioritized the ACES CG workflow in Substance Painter & Unreal to ensure that my texture colors remain consistent across software.
Texturing
La création et peinture de texture s'accompagne toujours en amont de recherches de références précises.
J'ai utilisé le PBR Validator pour toujours avoir les bonnes couleurs pour ma scène, proches des couleurs de la "vie réelle". Il s'agit d'un effet dans Substance Painter (également disponible dans Substance Designer).
J'ai utilisé Packer IO, un logiciel gratuit qui organise les UVs et les range de la meilleure façon possible.
Enfin, j'ai également privilégié le workflow ACES CG dans Substance painter & Unreal pour être sûre que mes couleurs de texture soient cohérentes d'un logiciel à l'autre.


Shading
I used for my projects the system of Master Material & instances. Used in game workflow, it is useful to avoid to plug a million times the nodes inside a material.
I constructed a system to have all the options that I want :
-regular PBR textures implementation ( albedo, normal, roughness maps..) with packaged occlusion/roughness/metallic( with 3 channel)
- Normal Maps, details normal maps and Bent normals if not too heavy
- RGB Masks
- World Aligned Overlays
- Special Moss overlay
- And finally I added details using decals.
Shading
J'ai utilisé pour mes projets le système de Master Material et d'instances. Utilisé dans le workflow de jeu, ce système est utile pour éviter de refaire des milliers de fois les mêmes nodes de base d'un matériel.
J'ai construit un système pour avoir toutes les options que je voulais :
- Implémentation des textures PBR classiques (albedo, normal, maps de roughness, etc.) avec occlusion/roughness/metallic empaqueté (sur 3 canaux RGB)
- Normal Maps, détails des normal maps et Bent normals s(i cela n'alourdit pas trop le projet)
- Masques RGB
- Superpositions alignées au monde
- Superposition spéciale de mousse
- Et enfin, j'ai ajouté des détails à l'aide de decals.


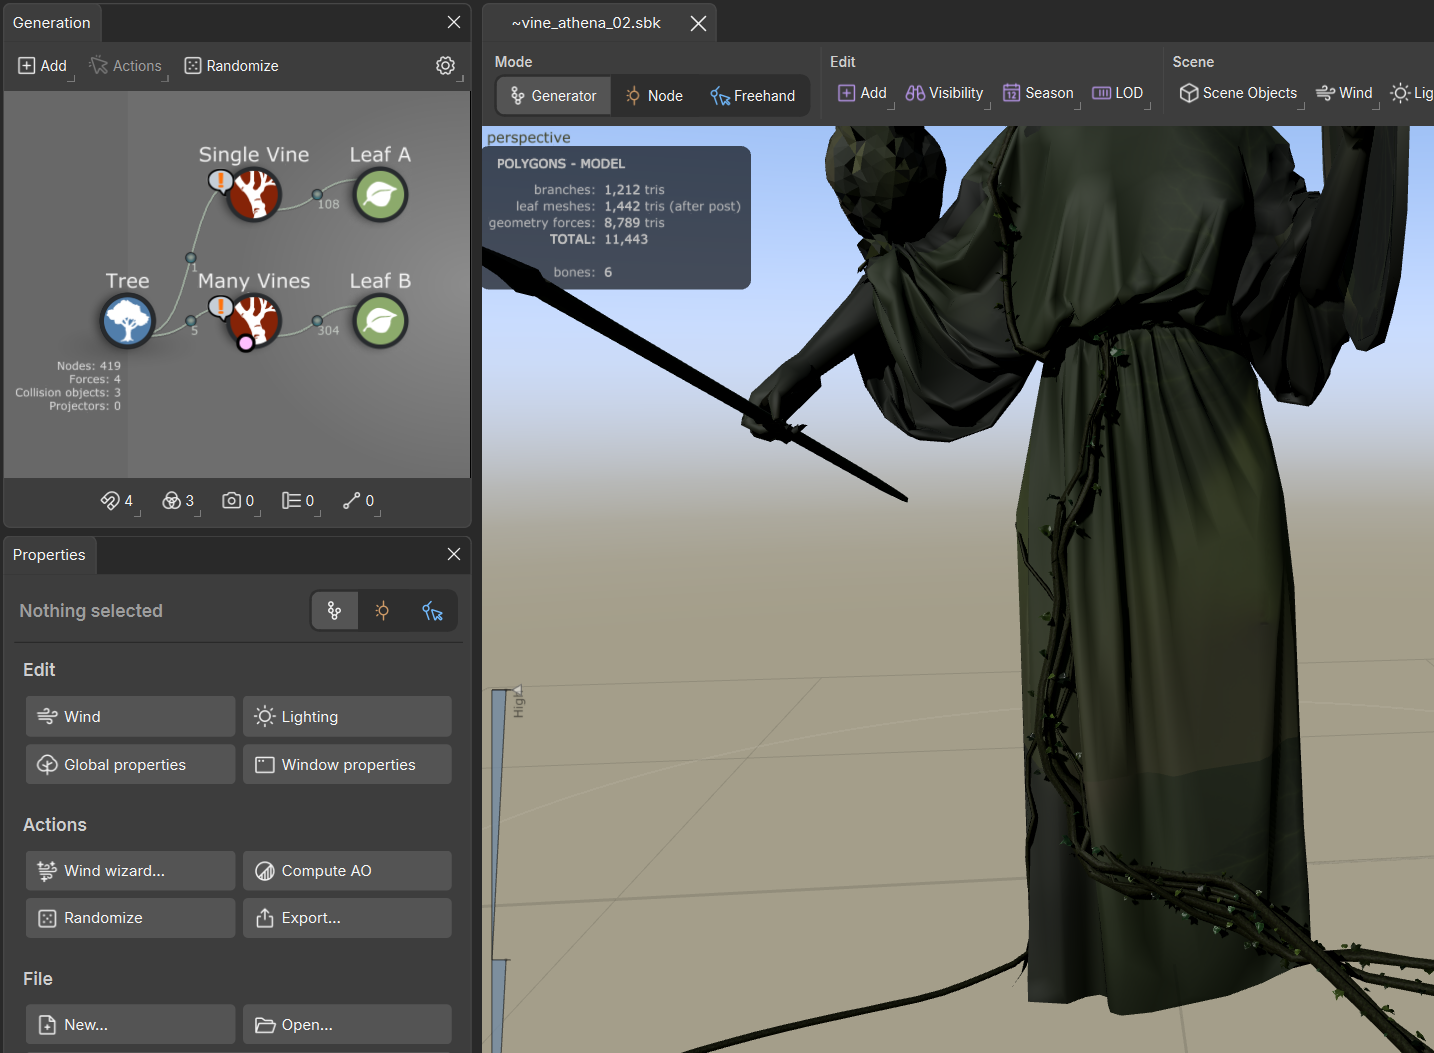
Vegetation
I used SpeedTree for this project to create the vines and shrubs. The software's node-based workflow is very intuitive and makes it easy to navigate. I also used its free alternative, the open-source software Tree It!
Vegetation
J'ai utilisé SpeedTree pour ce projet, pour faire les vignes et les arbustes. La construction en nodes du logiciel est très intuitive et permet de s'y retrouver facilement. J'ai également utilisé sa version gratuite ; le logiciel Open Source Tree it !
Lighting
The lighting is mainly composed of a strong directional light ("sun") in Unreal Engine, as well as an atmospheric sky. I adjusted the indirect lighting with a more blue/green tint to color the foreground shadows differently and make them stand out.
Lighting
La lumière est surtout constituée d'une forte lumière directionnelle ("sun") dans Unreal Engine, ainsi que d'un atmospheric sky dont j'ai travaillé la lumière indirecte avec une couleur plus bleue/verte pour qu'elle colore les ombres du premir plan differement et les faire ressortir.

Etalonnage
The color grading was done in DaVinci Resolve. My color palette was yellow-green, so I used a LUT that I created myself while adjusting the color corrections according to each shot.
Etalonnage
L' étalonnage a été réalisé sur Da Vinci Resolve. Ma palette de couleurs était le jaune-vert ; j'ai donc utilisé une Lut que j'ai fait moi même ; tout en ajustant les corrections colorimétriques selon les plans.
Conclusion
This project kept me on the edge for four months, bringing together all my skills, and I hope you like it!
So, thank you for reading this breakdown!
Conclusion
C'est un projet qui m'a tenu en haleine pendant 4 mois, qui regroupe toutes mes compétences et qui j'espère vous plait !
Merci d'avoir lu ce breakdown!